


Preparing a garden bed can seem like an intimidating task.
You want beautiful plants, vegetables, and flowers to fill your landscape and be the talk of the neighborhood, but you just don’t know where to start.
We understand how you feel and that is why we are going to show you step by step how to prepare a garden bed that will let you grow healthy and gorgeous greens.
The preparation is the foundation and most important part of your raised garden bed. But, once you are finished with these steps, the hardest part of your gardening experience is done.
So, are you ready for a lush and lavish growing season in your yard?
Here are the 3 steps on how to prepare a garden bed for healthy plants, flowers, and vegetables.
How to Prepare a Garden Bed in 3 Steps
1. Pick Your Location
The first step when preparing a garden bed is picking the best spot for it on your landscape.
If you have a lot of open land then it shouldn’t be too hard to find a spot, but if you have limited space then you need to be careful when choosing your location.

Find a Sunny Spot
The amount of sun your plants and vegetables need vary for each type. So, if you’re having trouble finding a spot in your yard that gets ample amount of sun, then you may want to grow veggies that only require 2-4 hours of sunlight each day.
If you need some ideas, the Gardening Channel has a great list of vegetables that can effectively grow in partial shade.
Check for Public and Irrigation Lines
After you have picked a sunny location for your plants, it’s important to make sure there are no power or utility lines underneath your designated area.
Contact your local government and electrical supplier to verify that the area you selected is safe.
Mark the Layout
Now that you found a safe and sunny spot, it’s time to measure and mark your location.
Consider how many plants you want to grow and ensure that each will have enough space to be healthy. Spacing will depend upon the vegetables you are growing. Check out this chart by howstuffworks to find out how much space your vegetables need.
Then, use spray paint or stakes to mark the area for your garden bed.
2. Select and Prepare Your Soil
The next step in preparing a garden bed involves choosing the right type of soil for your plants and removing current vegetation in your marked area.

Use High Quality Soil
You may be wondering if the type of soil really makes much of a difference. After all, isn’t all soil the same?
The answer to that question is no. Plants and vegetables need soil that is rich in organic matter and have plenty of nutrients. Also, avoid using any type of topsoil, which is usually dirt of very low quality.
If you are unsure how good your soil is, then you need to test it. Luckily, there are a lot of inexpensive home made soil testers out there, including this list from The Old Farmer’s Almanac.
Remove Weeds, Grass, and Vegetation
Get rid of as much grass and weeds in your garden bed area as possible.
It may be difficult to remove every single tiny weed, so once you removed most of the vegetation, we recommend covering the area with at least four layers of wet newspaper.
Next, completely cover the newspaper with a thick layer of compost. The method is completely organic, and the newspaper will decompose over several months. This will also improve your soil quality while killing all remaining vegetation.
If it’s already growing season and you don’t have time to wait several months, then you can use a herbicide to kill the remaining vegetation. If you use this method, be aware that some herbicides can remain active for an extended period afterwards.
Turn the Soil Over
Once all the vegetation is dead, grab a shovel and turn the soil over.
Make sure that the soil you are working with is damp enough so it can easily be worked over. Soil that is too wet will clump together and soil that is too dry can be harmful when preparing a garden bed.
A good rule of thumb is to dig at least 12 inches down when turning the soil over (about the size of a shovel spade).

3. Make the Garden Bed
You picked your location and prepared your soil for optimal plant and vegetable growth. Now it’s times to make your garden bed.
Add Level Surface of Organic Material
Once the soil is turned over, add another layer of compost (around 2 inches thick) over the garden bed, and turn the soil over again to mix in the compost.
After mixing in the last layer of compost, rake the garden bed to make a level surface. Remove any additional twigs, branches, or rocks on the surface as well.
Some additional weeds might be exposed once you are done turning. To get rid of these weeds, you can either use a layer of mulch (around 3 inches thick) or a weed & feed product. Note that using a weed & feed product will kill all germinating seeds, not just weeds.
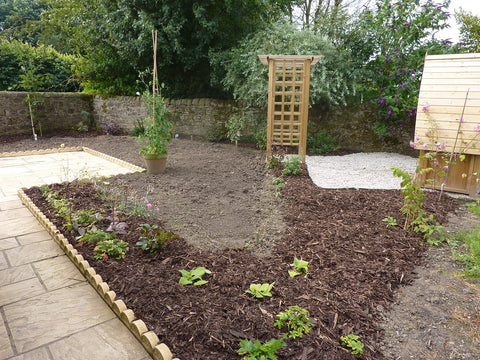
Consider Using a Raised Garden Bed
If your garden bed didn’t turn out the way you wanted or your soil is too moist and heavy, consider using a raised garden bed.
Raised garden beds are a great option that will allow water to drain better and you don’t have to dig down and till the soil.

Ready to Prepare a Garden Bed in Your Space?
Preparing a garden bed can seem intimidating, but if you follow these steps you can easily make a garden bed that grows healthy and lush plants.
All you need to do is pick your location, prepare your soil, and make the garden bed.
Now go outside, enjoy the nice weather, and earn your green thumb.
We would also love to answer any questions or hear about any experiences you have preparing a garden bed. Make sure to leave a comment below!


3 comments
Madie Corbould
To the sunnydazedecor.com owner, You always provide great examples and real-world applications, thank you for your valuable contributions.
Krista Borchgrevink
Hello sunnydazedecor.com admin, Great job!
Sam Wortman
Hello sunnydazedecor.com webmaster, Good job!