


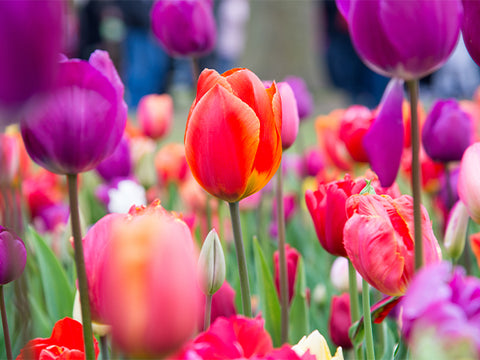
Springtime brings a burst of colors and life, and what better way to invigorate the garden’s beauty than by planting tulip bulbs? These vibrant flowers are synonymous with spring, adding a touch of elegance and charm to any outdoor space. If you’re eager to get your hands dirty and witness the spectacle of tulips blooming, read on to learn when and how to plant tulip bulbs in the spring.
When is the Ideal Time to Plant Tulip Bulbs?
Tulip bulbs require about 14 weeks of chilling at 35-50 degrees Fahrenheit in order to sprout and bloom. Chilling allows the bulbs to absorb nutrients from the ground so they have enough energy to sprout as the temperatures warm. Because of this, tulip bulbs are usually planted in the fall to ensure they are ready to bloom in the spring. But that doesn’t mean you can’t plant tulips in the spring, especially if you live somewhere with a cold, winter climate! Just be sure to begin planting the bulbs as soon as the soil becomes workable and temperatures consistently hover above freezing.

How to Plant Bulbs in the Spring
Planting tulip bulbs in the spring is possible, but it requires planning if you want to enjoy colorful blooms. Before you can begin to plant bulbs in the garden, you must ensure they are properly chilled, just like they would be if bulbs were planted in the fall. To do this, plant the bulbs in nutrient-rich soil in a planter or freezer-safe container. Be sure to set the bulbs with the tip facing upward. Leave the bulbs in the fridge for 12-14 weeks and check them periodically to ensure they don’t sprout.
Once temperatures outdoors remain between 50-55 degrees Fahrenheit, depending on where you live, you can plant your chilled bulbs in the garden. Follow the steps below to start growing tulips.
1: Choose a Location
Select a sunny spot in your garden, raised bed, landscaping, or yard with well-drained soil. Tulips prefer full sun but can tolerate partial shade.
2: Prepare the Soil
To prepare the soil for planting, loosen it to a depth of about 12 inches using a garden fork or shovel. Remove any weeds or debris that may hinder bulb growth.
3: Dig Planting Holes
Using a bulb planter or hand trowel, dig holes for your tulip bulbs. The depth of the hole should be roughly three times the height of the bulb. Space the holes about 4-6 inches apart to allow for adequate airflow and growth.

4: Plant the Bulbs
Place each tulip bulb in its respective hole with the pointed end facing upwards. Gently backfill the holes with soil, ensuring that the bulbs are covered completely.
5: Water Thoroughly
After planting, give the bulbs a good drink of water to settle the soil and kickstart growth. Be mindful not to overwater, as excessive moisture can cause bulbs to rot.
6: Mulch and Protect
Apply a layer of mulch, such as shredded bark or straw, over the planted area to help retain moisture and suppress weeds. Additionally, consider using a wire mesh or netting to deter pests like squirrels and rodents from digging up the bulbs.
7: Monitor and Maintain
Keep an eye on your tulip bulbs as they begin to sprout and grow. Water them regularly, especially during dry spells, and remove any weeds that may compete for nutrients and space.
8: Enjoy the Blooms
With patience and care, your tulip bulbs will reward you with a spectacular display of colorful blooms. Sit back, relax, and revel in the beauty of spring as your garden comes to life!
Planting tulip bulbs in the spring is a delightful way to usher in the season of renewal and rejuvenation. By following these simple steps, you can cultivate a stunning floral display that will brighten your garden and lift your spirits. So grab your gardening tools and get ready to experience the joy of watching your tulips bloom in all their glory!


